
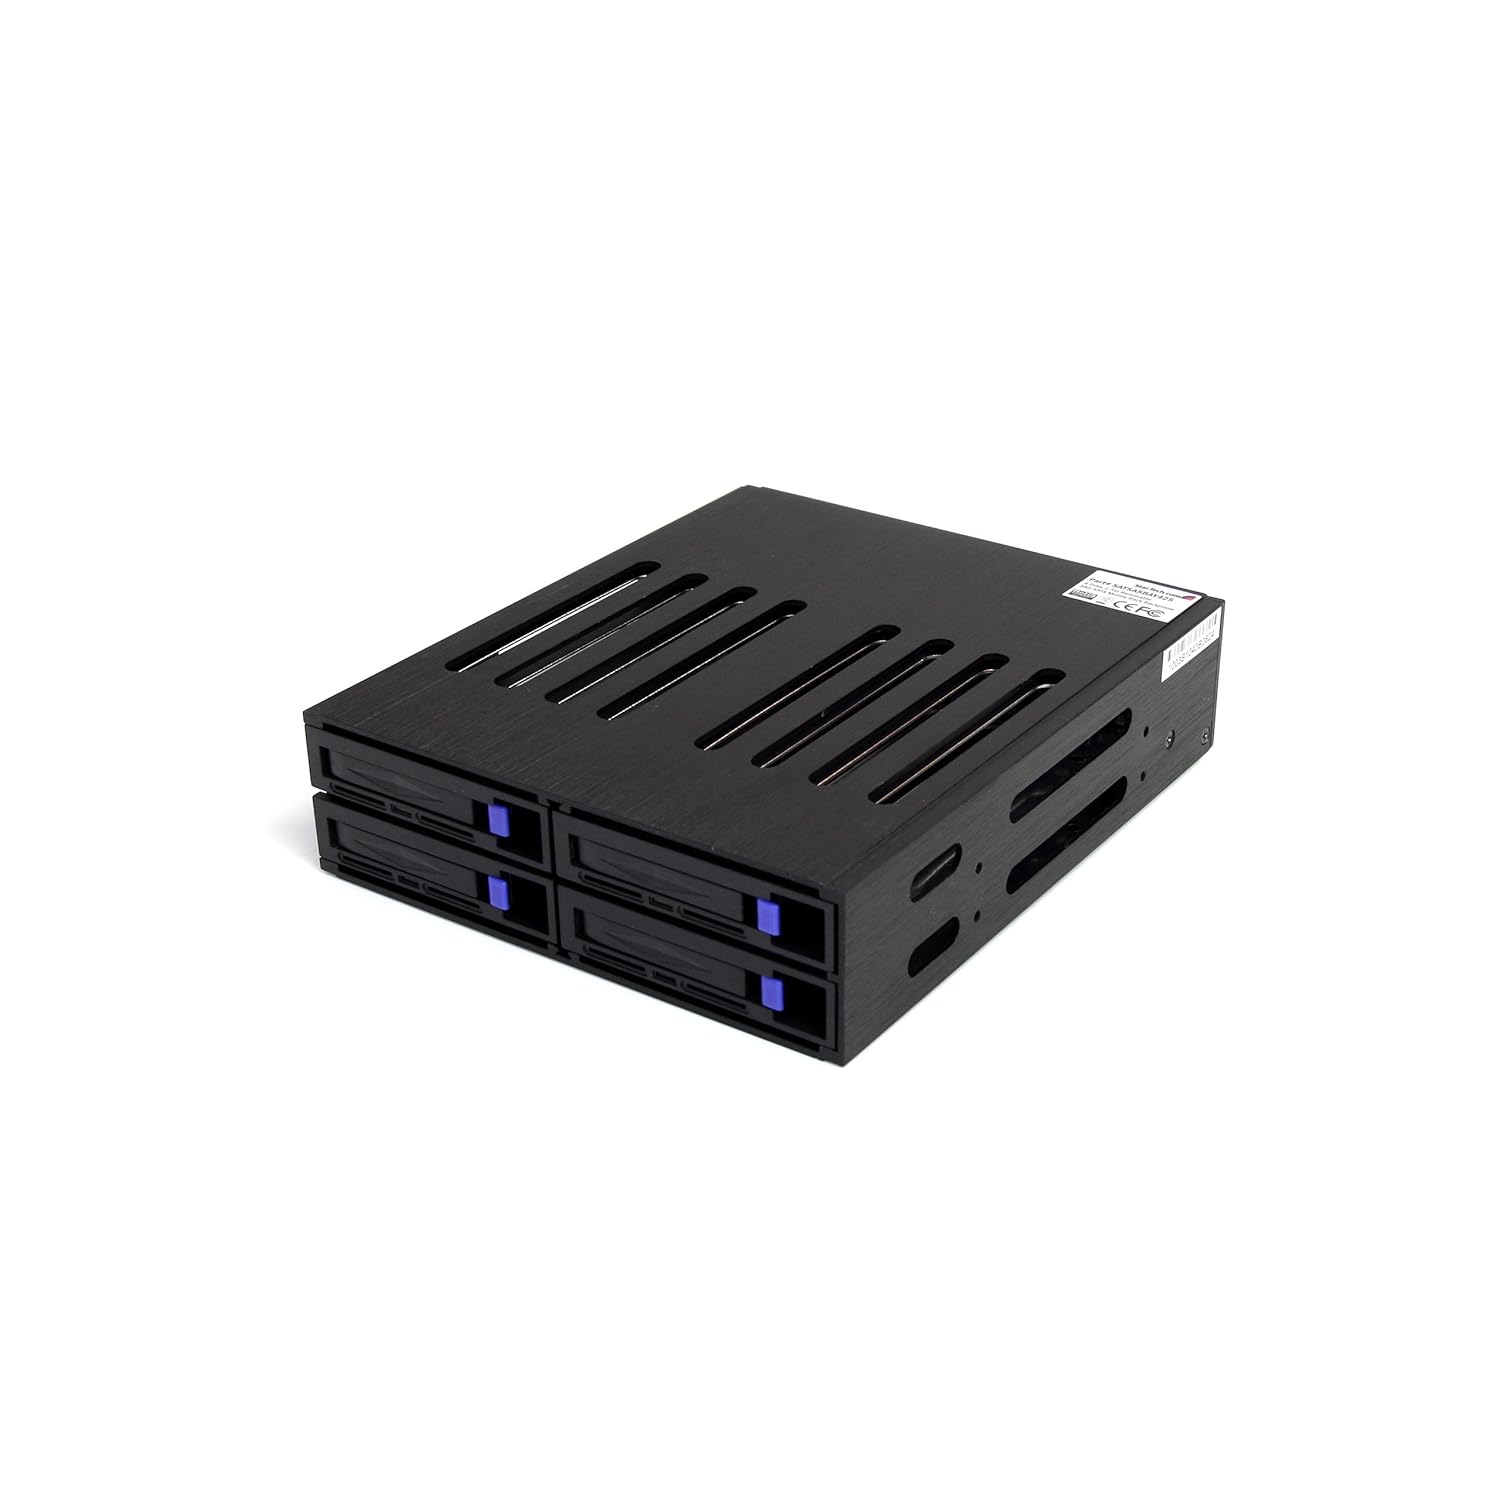
Supermicro CSE-M14TQC Use your media bay to add 12 Gbps SAS SSD drives to your server
Do you have a computer server, workstation or mini-tower PC that needs to have more 2.5" form factor hard disk drive (HDD), solid state device (SSD) or hybrid flash drives added yet no expansion space?
Do you also want or need the HDD or SSD drive expansion slots to be hot swappable, 6 Gbps SATA3 along with up to 12 Gbps SAS devices?
Do you have an available 5.25" media bay slot (e.g. where you can add an optional CD or DVD drive) or can you remove your existing CD or DVD drive using USB for software loading?
Do you need to carry out the above without swapping out your existing server or workstation on a reasonable budget, say around $100 USD plus tax, handling, shipping (your prices may vary)?
If you need implement the above, then here is a possible solution, or in my case, an real solution.

Supermicro CSE-M14TQC with hot swap canister before installing in one of my servers
In the past I have used a solution from Startech that supports up to 4 x 2.5" 6 Gbps SAS and SATA drives in a 5.25" media bay form factor installing these in my various HP, Dell and Lenovo servers to increase internal storage bays (slots).
Via Amazon.com StarTech 4 x 2.5" SAS and SATA internal enclosure
I still use the StarTech device shown (read earlier reviews and experiences here, here and here) above in some of my servers which continue to be great for 6Gbps SAS and SATA 2.5" HDDs and SSDs. However for 12 Gbps SAS devices, I have used other approaches including external 12 Gbps SAS enclosures.
Recently while talking with the folks over at Servers Direct, I mentioned how I was using StarTech 4 x 2.5" 6Gbps SAS/SATA media bay enclosure as a means of boosting the number of internal drives that could be put into some smaller servers. The Servers Direct folks told me about the Supermicro CSE-M14TQC which after doing some research, I decided to buy one to complement the StarTech 6Gbps enclosures, as well as external 12 Gbps SAS enclosures or other internal options.
What is the Supermicro CSE-M14TQC?
The CSE-M14TQC is a 5.25" form factor enclosure that enables four (4) 2.5" hot swappable (if your adapter and OS supports hot swap) 12 Gbps SAS or 6 Gbps SATA devices (HDD and SSD) to fit into the media bay slot normally used by CD/DVD devices in servers or workstations. There is a single Molex male power connector on the rear of the enclosure that can be used to attach to your servers available power using applicable connector adapters. In addition there are four seperate drive connectors (e.g. SATA type connectors) that support up to 12 Gbps SAS per drive which you can attach to your servers motherboard (note SAS devices need a SAS controller), HBA or RAID adapters internal ports.
Cooling is provided via a rear mounted 12,500 RPM 16 cubic feet per minute fan, each of the four drives are hot swappable (requires operating system or hypervisor support) contained in a small canister (provided with the enclosure). Drives easily mount to the canister via screws that are also supplied as part of the enclosure kit. There is also a drive activity and failure notification LED for the devices. If you do not have any available SAS or SATA ports on your servers motherboard, you can use an available PCIe slot and add a HBA or RAID card for attaching the CSE-M14TQC to the drives. For example, a 12 Gbps SAS (6 Gbps SATA) Avago/LSI RAID card, or a 6 Gbps SAS/SATA RAID card.
Via Supermicro CSE-M14TQC rear details (4 x SATA and 1 Molex power connector)

CSE-M14TQCrear view before installation
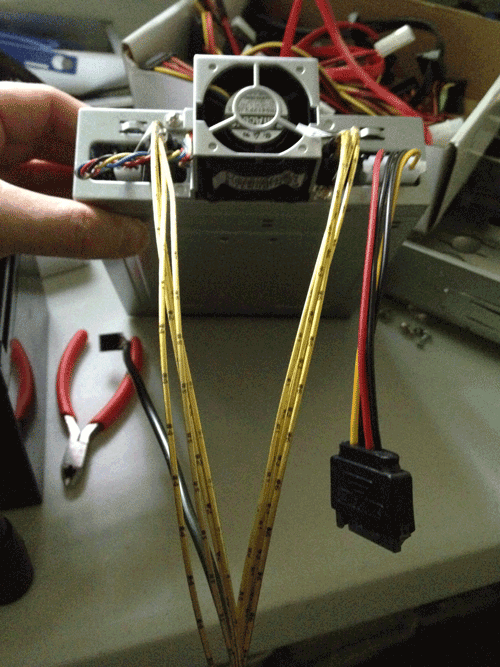
CSE-M14TQC ready for installation with 4 x SATA (12 Gbps SAS) drive connectors and Molex power connector
Tip: In the case of the Lenovo TS140 that I initially installed the CSE-M14TQC into, there is not a lot of space for installing the drive connectors or Molex power connector to the enclosure. Instead, attach the cables to the CSE-M14TQC as shown above before installing the enclosure into the media bay slot. Simply attach the connectors as shown and feed them through the media bay opening as you install the CSE-M14TQC enclosure. Then attach the drive connectors to your HBA, RAID card or server motherboard and the power connector to your power source inside the server.
Note and disclaimer, pay attention to your server manufactures power loading and specification along with how much power will be used by the HDD or SSD’s to be installed to avoid electrical power or fire issues due to overloading!

CSE-M14TQC installed into Lenovo TS140 empty media bay

CSE-M14TQC installed with front face plated installed on Lenovo TS140
Where to read, watch and learn more
- Supermicro CSE-M14TQC specification
- Lenovo TS140 Server and StorageIOlab Review
- Lenovo ThinkServer TD340 Server and StorageIOlab Review
- Part II: Lenovo TS140 Server and StorageIOlab Review
- Software defined storage on a budget with Lenovo TS140 and part II
- Dell Inspiron 660 Virtual Diamond in the rough
- What to get a Geek for a gift V2015
What this all means and wrap up
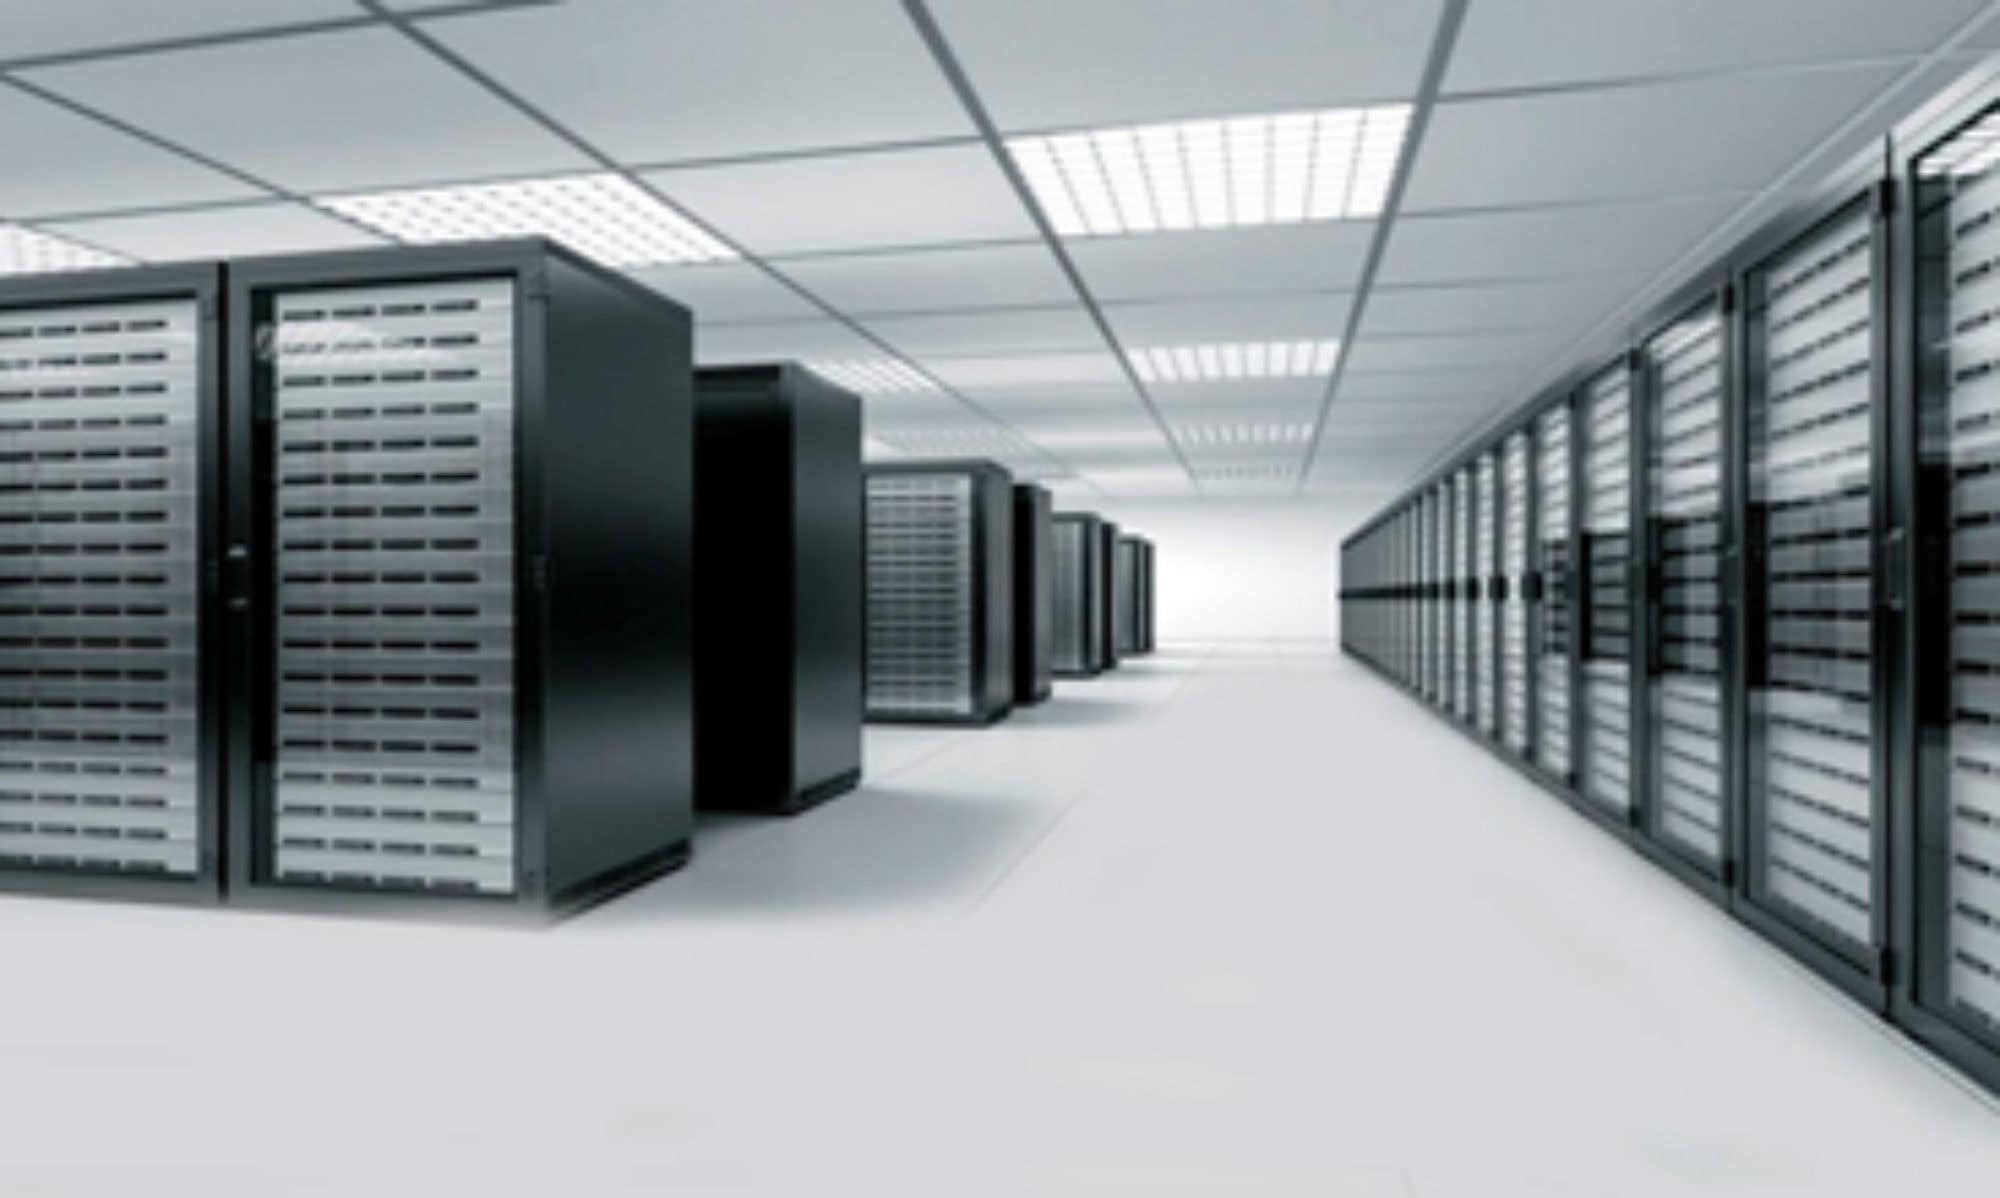
If you have a server that simply needs some extra storage capacity by adding some 2.5" HDDs, or boosting performance with fast SSDs yet do not have any more internal drive slots or expansion bays, leverage your media bay. This applies to smaller environments where you might have one or two servers, as well as for environments where you want or need to create a scale out software defined storage or hyper-converged platform using your own hardware. Another option is that if you have a lab or test environment for VMware vSphere ESXi Windows, Linux, Openstack or other things, this can be a cost-effective approach to adding both storage space capacity as well as performance and leveraging newer 12Gbps SAS technologies.
For example, create a VMware VSAN cluster using smaller servers such as Lenovo TS140 or equivalent where you can install a couple of 6TB or 8TB higher capacity 3.5" drive in the internal drive bays, then adding a couple of 12 Gbps SAS SSDs along with a couple of 2.5" 2TB (or larger) HDDs along with a RAID card, and high-speed networking card. If VMware VSAN is not your thing, how about setting up a Windows Server 2012 R2 failover cluster including Scale Out File Server (SOFS) with Hyper-V, or perhaps OpenStack or one of many other virtual storage appliances (VSA) or software defined storage, networking or other solutions. Perhaps you need to deploy more storage for a big data Hadoop based analytics system, or cloud or object storage solution? On the other hand, if you simply need to add some storage to your storage or media or gaming server or general purpose server, the CSE-M14TQC can be an option along with other external solutions.
Ok, nuff said
Cheers
Gs
Greg Schulz – Author Cloud and Virtual Data Storage Networking (CRC Press), The Green and Virtual Data Center (CRC Press) and Resilient Storage Networks (Elsevier)
twitter @storageio
All Comments, (C) and (TM) belong to their owners/posters, Other content (C) Copyright 2006-2026 Server StorageIO and UnlimitedIO LLC All Rights Reserved

